
Open a new document in Adobe Illustrator
File -> Cmd N


1080 px by 1080 px

2.
Using Type tool

2.
Using Type tool
Set stroke size to 1 pt
Character to chosen font
Set font size to 100 pt
Paragraph to centred


3.
Write your name
Press Option key and G to get © symbol on Mac
Write the year
(You can use a logo instead of your name)

4.
Save as an .ai file
5.
Open the saved .ai file in Photoshop
An Import pdf document will open, change the maximum
image size to be 1080 px.
An Import pdf document will open, change the maximum
image size to be 1080 px.

6.
Go to Edit -> Define Brush Preset
Type in a name then press OK


7.
Click on Brushes symbol on right of screen
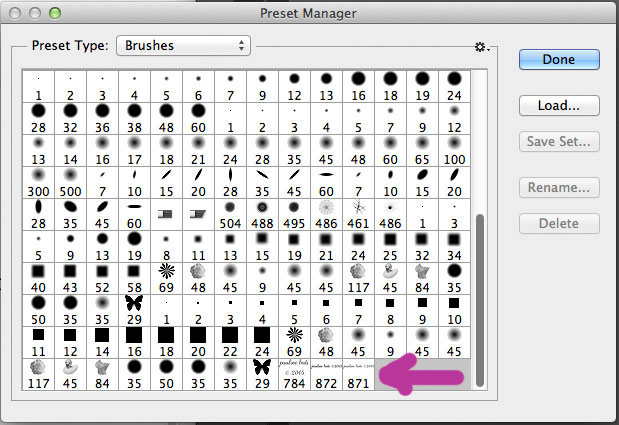
Click on Brush Preset Manager icon (looks like a grid pattern)
Scroll down to bottom of sample brushes
(last one is probably the watermark brush just created)
Click on newly created watermark brush and move it to the top of the brush samples (this makes finding the brush very easy)
Click Done


8.
Open a Photoshop Image
Press Command Shift N to open a new layer (very important step!!!!!!!!!!)


9.
Use your new watermark brush


10.
Command T allows you to re-size and move the watermark
Opacity allows you to fade the watermark if it is too obvious
Colour picker allows you to sample a colour from your image to make your watermark blend better


Comments.
You can use Photoshop to create your watermark image but
the beauty of Adobe Illustrator is that the image is vector-based and thus infinitely scalable.
I used Rouge Script for my watermark font. I got the free downloadable font from here. Then, I searched under calligraphy for a font I liked and that was also in the public domain.
I hope you find it as easy as I did to create your own watermark.
Luv pauline

